Sync Gateway, Kotlin, and Jetpack Compose
- Learn how to set up replication of documents in Couchbase Lite using Sync Gateway
- Explore your Couchbase Lite client's configuration options
Introduction
In this part of our learning path, you will walk through the "Audit Inventory" demo application of using Couchbase Lite with the Replicator, which means the database will sync information using two way replication between the mobile app and a Couchbase Server using Sync Gateway.
In previous steps of the learning path we have enabled Live Queries on both the Project Listing screen and the Audit Listing screen. Once replication is started those screens will update anytime new documents or changes to existing documents are replicated to the mobile device.
NOTE: This step assumes you completed the all previous steps of the learning path and specifically the
Sync Gateway Setupthat sets up Sync Gateway and Couchbase Server for this demo in docker on your local computer. You MUST complete this part of the learning path before moving forward.
In this step of the learning path you will learn the fundamentals of:
- Configure your Couchbase Lite clients for replication with the Sync Gateway
App Overview
While the demo app has a lot of functionality, this step will walk you through:
- Log in into the application
- Scrolling the list of projects
- Setting up Replication
- Starting Replication
- Reviewing the code
- Validating the data is properly replicated between server and mobile device(s)
Installation
Fetching App Source Code
Clone Source Code
- If you haven't already cloned the repo from the previous steps, clone the
Learn Couchbase Lite with Kotlin and Jetpack Composerepository from GitHub.
git clone https://github.com/couchbase-examples/android-kotlin-cbl-learning-path.gitWhen to Start Replication
Developers need to decide when to start replication. For some apps it makes sense after the user logs in, while for others it might make more sense once the application is fully loaded. In this app, two-way Replication between the app and the Sync Gateway is enabled from the Replication screen manually. Replication can't be started until the configuration is filled out, which is handled by another screen.
Try it out
-
Log in to the app with any username and password. Let's use the values "demo@example.com" and "P@ssw0rd12" for username and password fields respectively.
-
In the Demo App the Replicator screen can be found by tapping on the Drawer menu icon (sometimes referred to the Hamburger icon) in the upper left hand corner of the screen and tap on the Replication link.
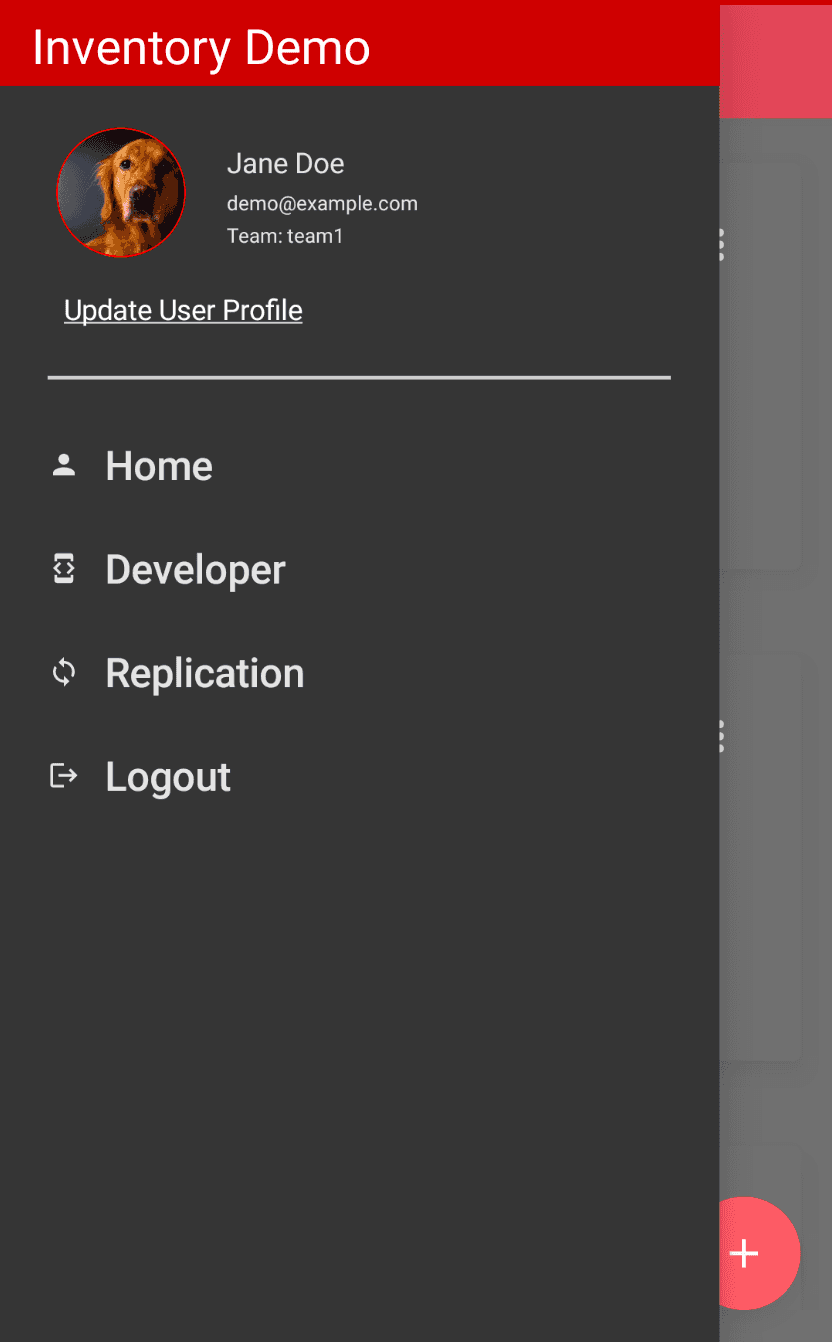
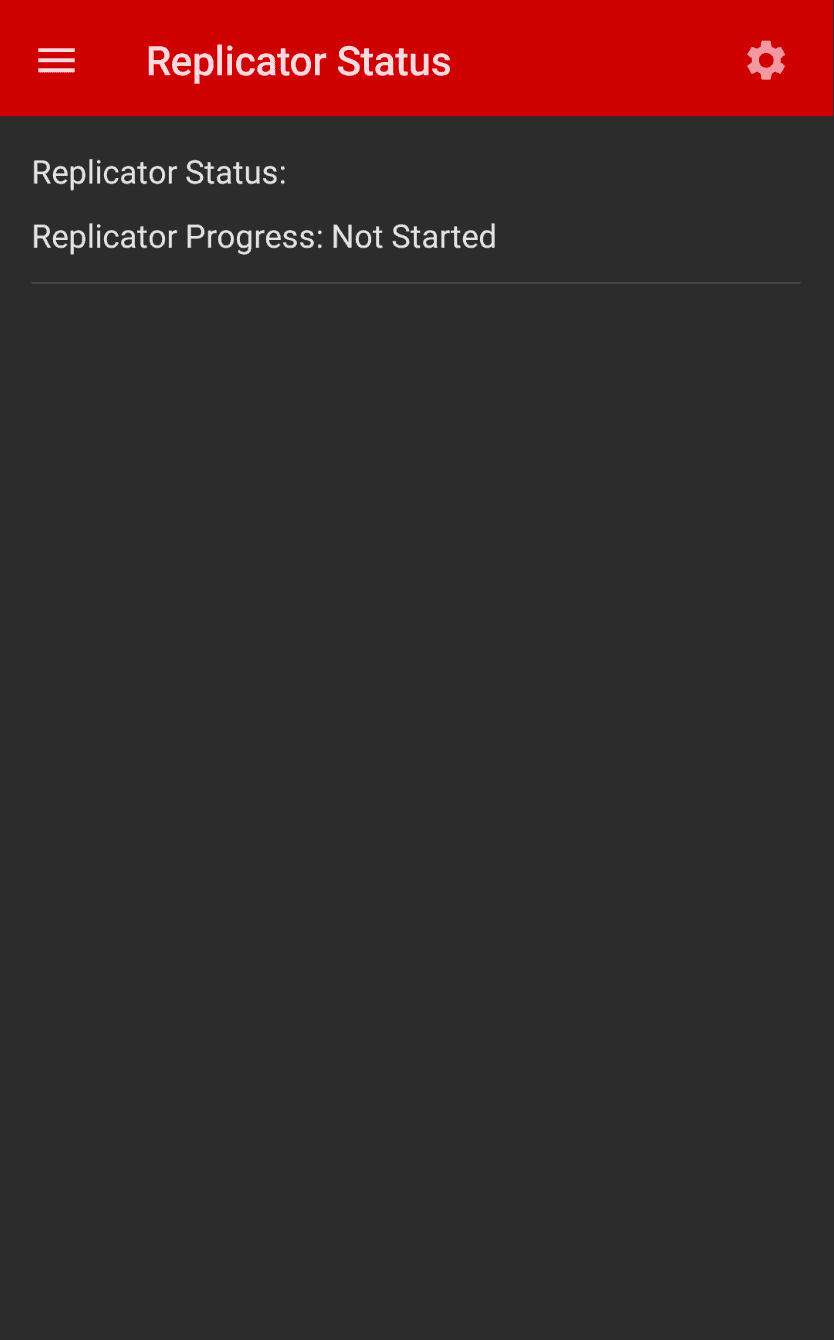
- The Replication Status screen will not allow you to start the replicator until it is configured. You can configure the replicator by tapping on the cog icon in the upper right hand corner of the App Bar. This will navigate to the Replication Configuration screen.
- The Replication Configuration screen allows you to set several of the settings that are required to start the replicator.
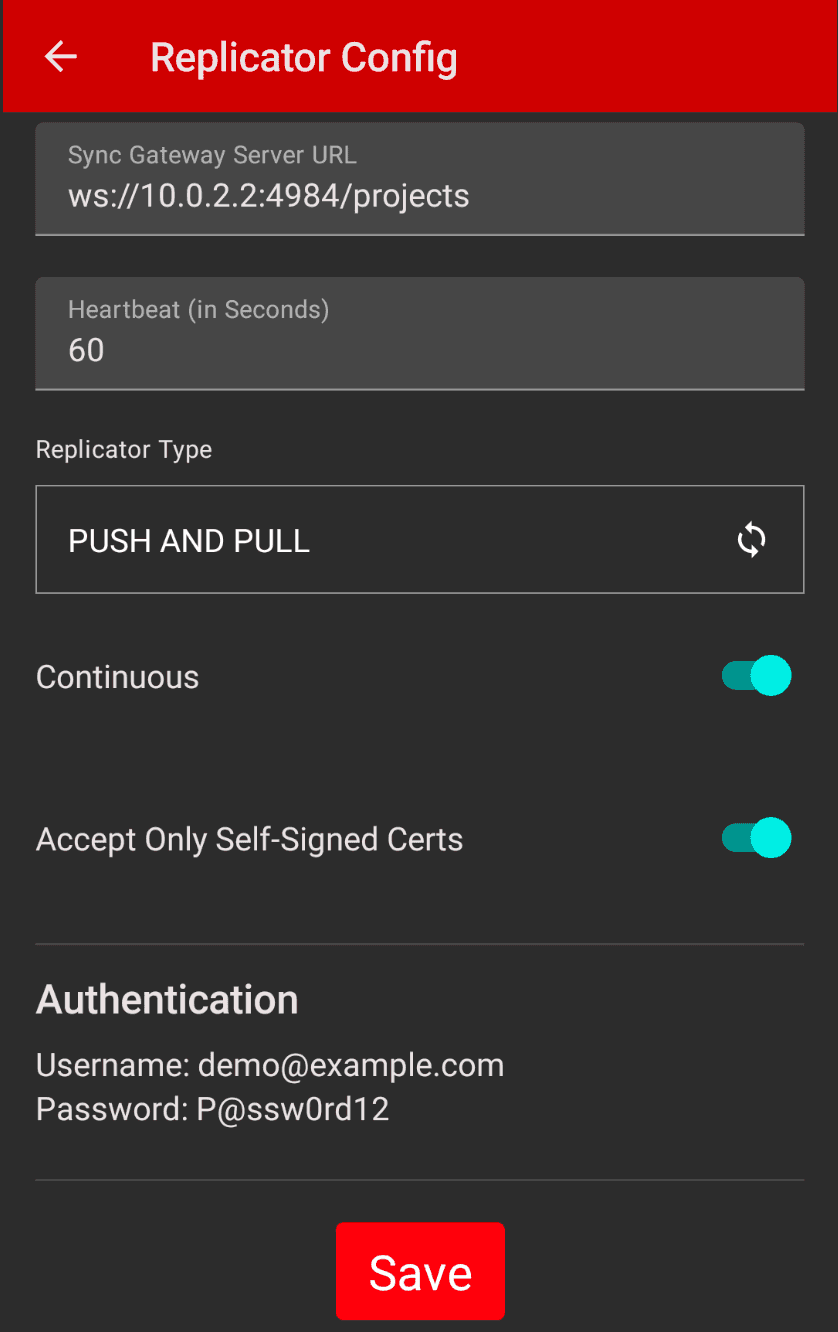
- Sync Gateway Server URL is the URL that the Sync Gateway is running on. By default is set to
ws://10.0.2.2/projectswhich is the IP address used by emulators to talk to your local computer. If you are running this on a physical device, you will need to change this IP to your local computers IP. - Heartbeat is part of the retry configuration and is used to detect connection errors. The current value is set to 60 seconds.
- Replicator Type - this is often referred to
Sync Modeand defaults to Push and PUll - Continious is also part of the
Sync Modesettings and defaults to on which means the application will contiue to replicate until manually stopped. - Accept Only Self-Signed Certs is an Enterprise only feature and currently is turned on. When this setting is turned off client validates the server’s certificates against the system CA certificates. The server must supply a chain of certificates whose root is signed by one of the certificates in the system CA bundle.
- The Authentication information is read-only and is the username and password that you signed into the mobile app with. This will be used to authenticate against Sync Gateway so that the documents that are replicated are only the ones that the user's team has access to.
- Tap the Save button - it will save the configuration and returns you to the main Replicator screen.
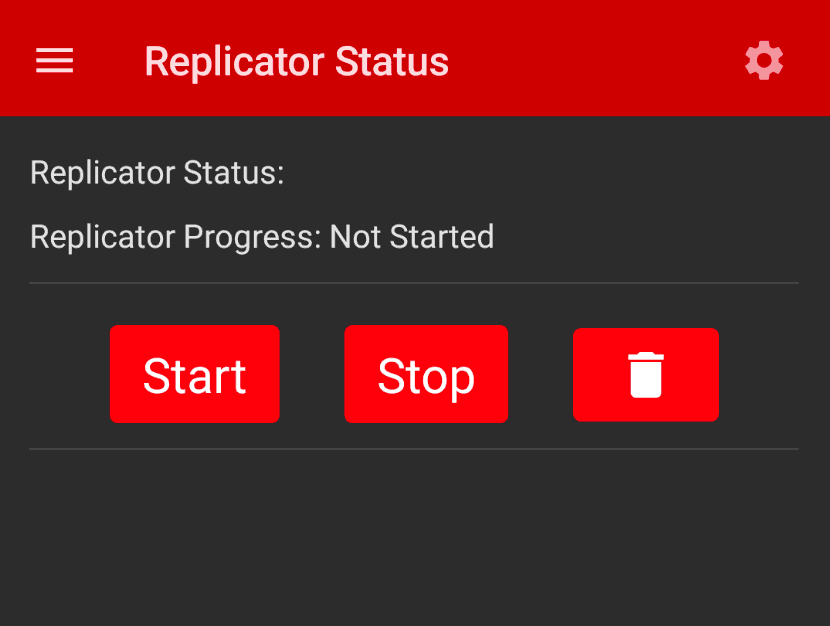
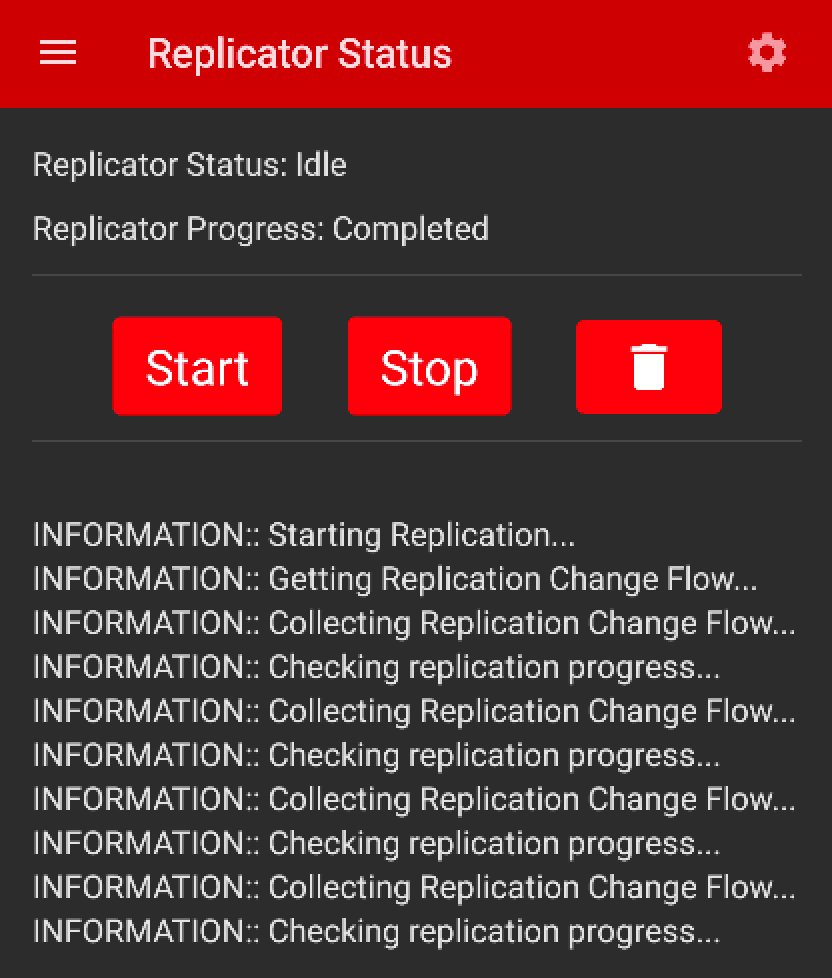
- The Replication Status screen now has new buttons on it since a configuration is available to stop, start, and delete the configuration.
NOTE: At this point your Couchbase Server and Sync Gateway servers should be started in Docker which was covered in the
Sync Gateway Setupstep of the learning path. If you start replication and the Sync Gateway Server is not started, you will time out trying to connect to it.
- Once replication starts you will see status messages appear in the mobile app. Replication shouldn't take long and when it's done the replicator status will change to IDLE.
Validate Documents Replicated
Valdiating that the documents replicated from the device and from server can be done from the mobile app and from Couchbase Server since we have two-way replication enabled.
Demo App
-
In the Demo App navigate to the Home screen which can be found by tapping on the Drawer menu icon (sometimes referred to the Hamburger icon) in the upper left hand corner of the screen and tap on the Home link.
-
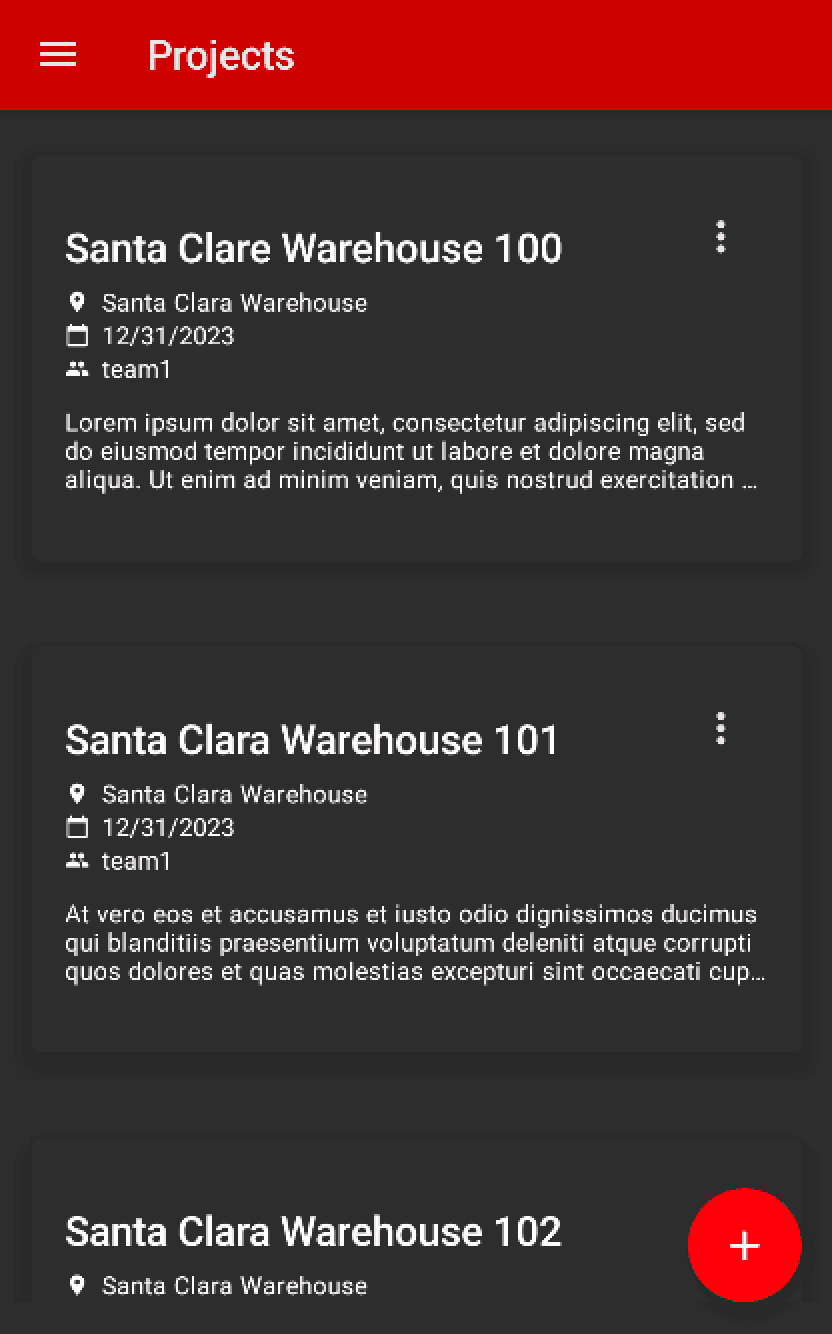
Scrolling through the list you should see three new documents starting with the word
Warehouseand then a number. The numbers are different for each group of teams.- Team1: Warehouse 100, Warehouse 101, Warehouse 102
- Team2: Warehouse 200, Warehouse 201, Warehouse 202
- Team3: Warehouse 300, Warehouse 301, Warehouse 302
- You can test other team members by logging out and logging in as
demo2@example.comordemo4@example.comwith the same password and starting the replicator to see those documents listed above.
Couchbase Server with Administration Console
-
Open your web browser of choice and navigate to the following URL: http://localhost:8091/
-
Log into the portal using the same username and password that was displayed in the top of the Couchbase Server docker logs:
-
Username: Administrator
-
Password: P@$w0rd12
-
From the Cluster > Dashboard page click on Buckets link on the navigation menu on the left side of the screen.
-
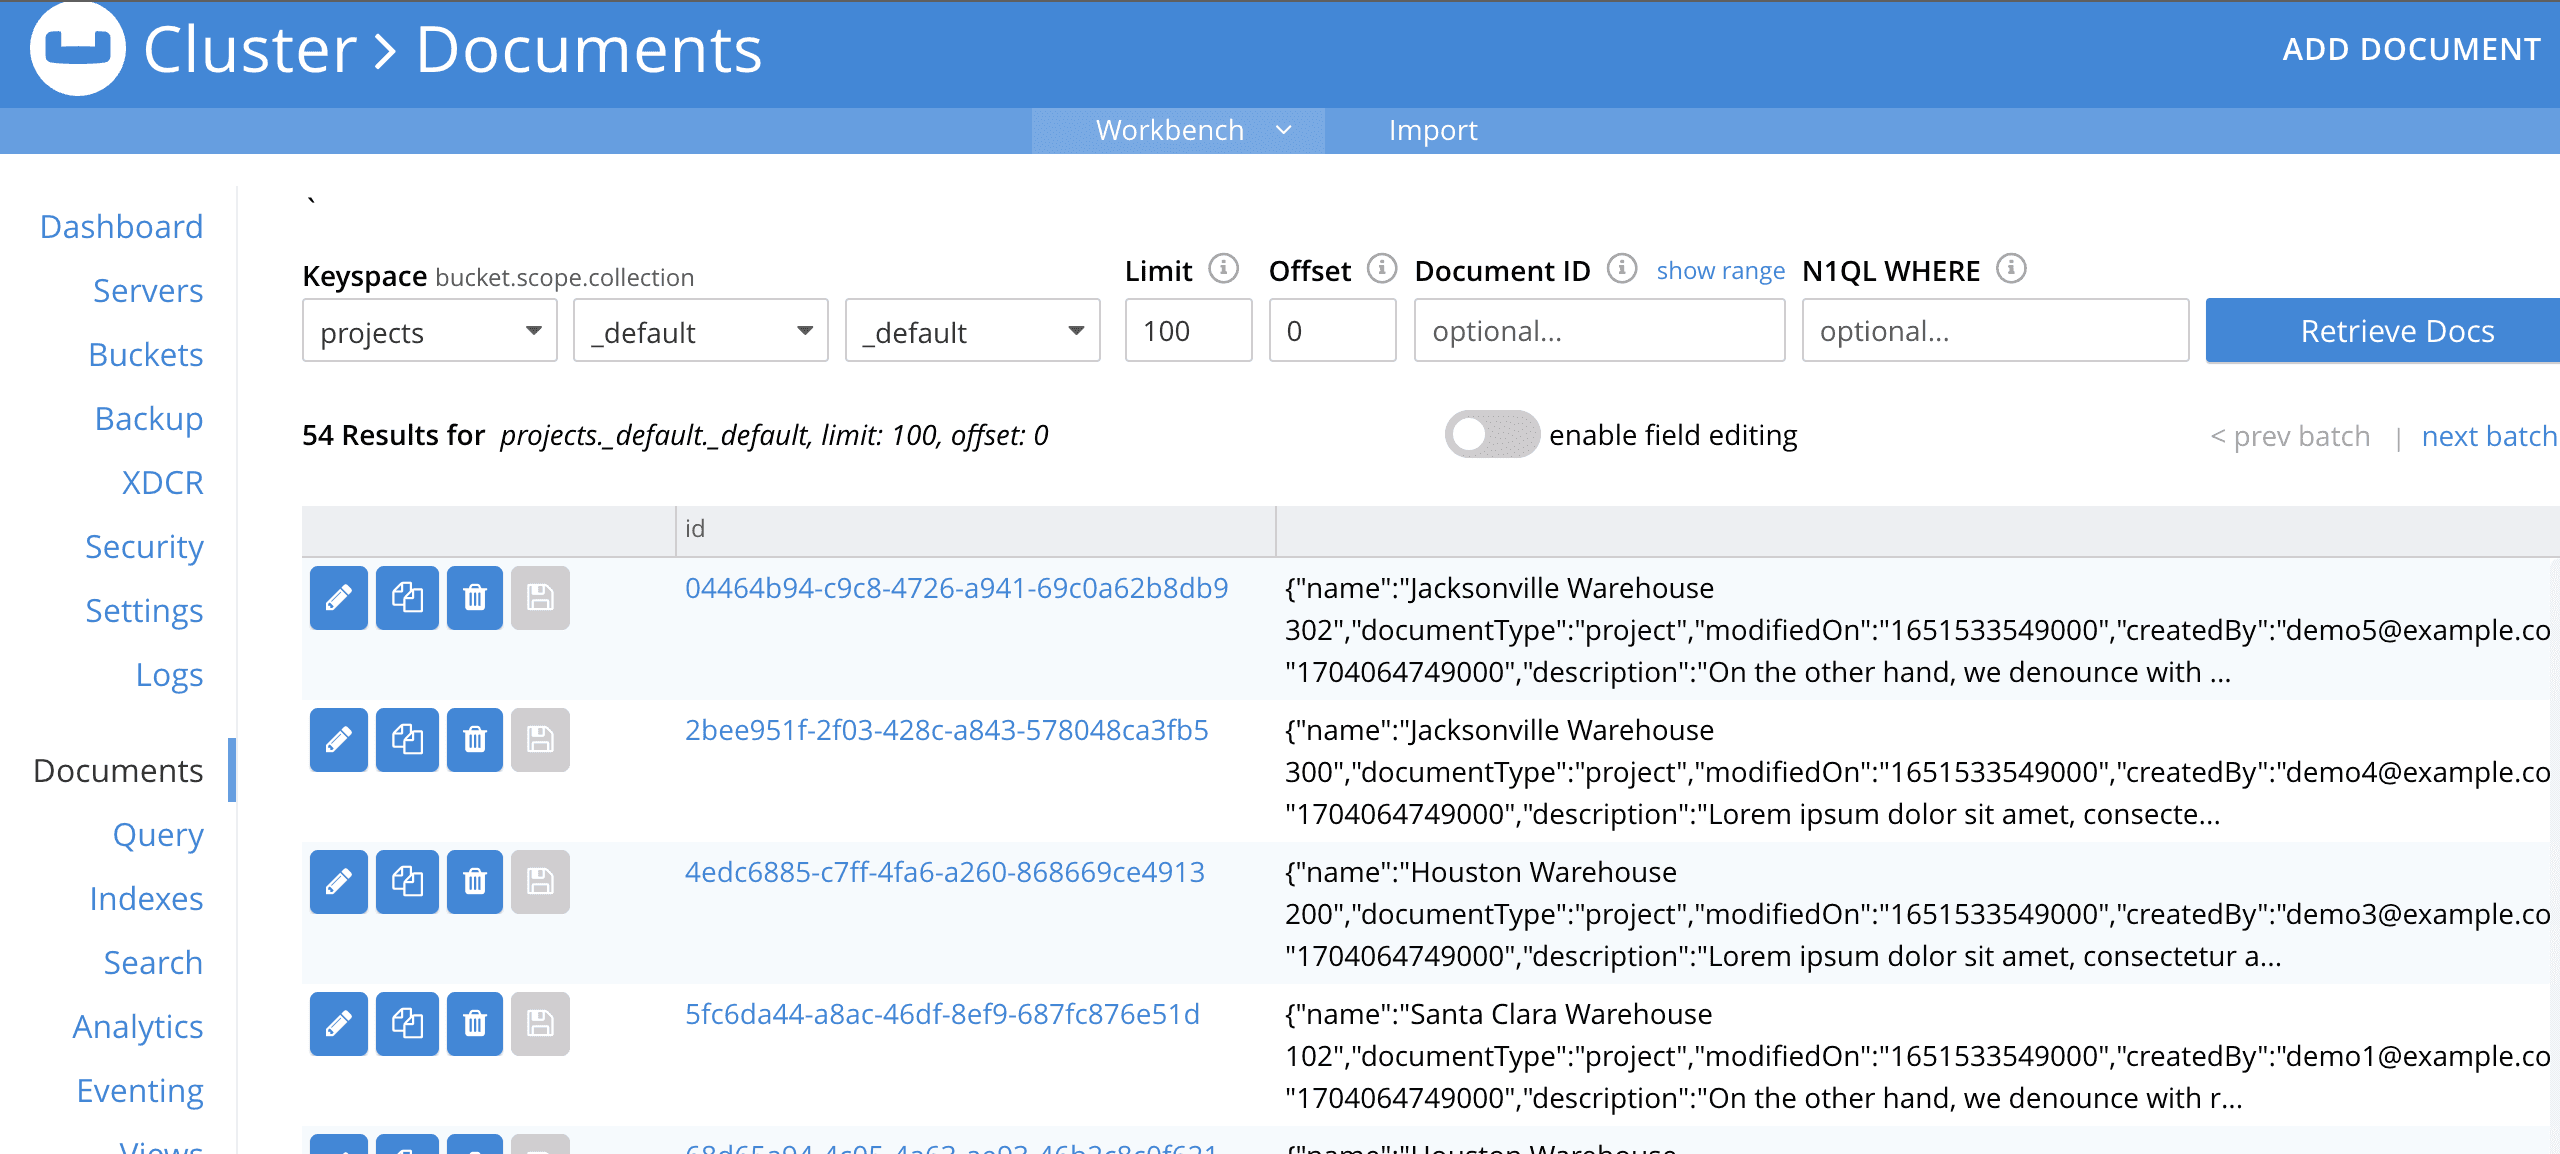
On this screen you can see the number items in the buck should have increased from the Sync Gateway Setup step of the learning path. To view the documents, click on the Documents link to open the Document browser.
-
Change the Limit box from the default value to 50 and click the Retrieve Docs button.
-
Scrolling through the list you should find your random documents that were created on the mobile device during the Batch operations step of the learning path.
Reviewing the Replicator code
Now that we have tried out replication, let's review how the replicator and replicator configuration code is setup. All code used by the ReplicatorViewModel and ReplicatorConfigViewModel us located in the ReplicatorServiceDb class.
-
Open the ReplicatorServiceDb.kt file.
-
The override of replicatorConfig is used to setup the config with default values that you saw on the Replication Configuration screen.
//if your sync gateway server is running on a different IP change it here
override var replicationConfig = mutableStateOf(
 ReplicatorConfig(
  username = loggedInUser.username,
  password = loggedInUser.password,
  endpointUrl = "ws://10.0.2.2:4984/projects",
  replicatorType = "PUSH AND PULL",
  heartBeat = 60L,
  continuous = true,
  selfSignedCert = true
 )
)-
As stated in the comments if your Sync Gateway server is not running on your local computer, this is where you would change that setting.
-
Anytime the replication configuration is changed on this screen the updateReplicatorConfig function is called.
replicatorManager?.let { replicatorResources ->
 val urlEndPoint = URLEndpoint(URI(replicationConfig.endpointUrl)) // 1
 replicatorResources.replicatorConfiguration = ReplicatorConfiguration(replicatorResources.database, urlEndPoint) // 2
 replicatorResources.replicatorConfiguration?.let { replicatorConfiguration -> //3
  replicatorConfiguration.isContinuous = replicationConfig.continuous // 4

  when (replicationConfig.replicatorType) { // 5
   "PULL" -> replicatorConfiguration.type = ReplicatorType.PULL // 5
   "PUSH" -> replicatorConfiguration.type = ReplicatorType.PUSH // 5
   else -> replicatorConfiguration.type =  ReplicatorType.PUSH_AND_PULL // 5
  }
  val authenticator = BasicAuthenticator( // 6
   replicationConfig.username, // 6
   replicationConfig.password.toCharArray() // 6
  )
  replicatorConfiguration.setAuthenticator(authenticator) //6
  replicatorResources.replicator =
  Replicator(replicatorManager?.replicatorConfiguration!!) //7
  }

 canStartReplication.value = true //8
 this.replicationConfig.value = replicationConfig //9
}- The endpoint URL for the Sync Gateway server is created
- A ReplicatorConfiguration is created using the database and urlEndpoint created in #1.
- Because the ReplicatorConfiguration could be null we need to unbox it for usage and create a reference to it using replicatorConfiguration
- Set the continuous setting for the replicator
- Set the Sync Mode of the replicator to either PUSH, PULL, or PUSH_AND_PULL
- Set the username and password that will be used to communicate with the Sync Gateway server.
- Create a new Replicator reference using the configuration that can be used to start and stop replication
- Set the canStartReplication state varible which is used in the UI to hide and show the Start, Stop, and Delete buttons on the main Replicator Status screen
- Save the configuration for future modifications on the Replication Configuration screen.
- The startReplication function is used to start the replicator.
override fun startReplication() {
 try {
  replicatorManager?.replicator?.start()
  isReplicationStarted = true
 } catch (e: Exception){
  Log.e(e.message, e.stackTraceToString())
 }
}- The start function is called on the replicatorManager's replicator
- The stopReplication function is used to stop the replicator.
override fun stopReplication() {
 try {
  replicatorManager?.replicator?.stop()
  isReplicationStarted = false
  canStartReplication.value = false
 } catch (e: Exception){
  Log.e(e.message, e.stackTraceToString())
 }
}-
The stop function is called on the replicatorManager's replicator
-
The canStartReplication variable is used to force the user to go back into the configuration screen and click save again before starting replicaton. This is because when the application is sent to the background this method is called so that replication doesn't run in the background and try to update UI components that it doesn't have access to because they are no longer running on the main thread.
- To view the lifecycle code - open MainViewModel.kt and locate the closeDatabase function.
val closeDatabase: () -> Unit = {
 viewModelScope.launch(Dispatchers.IO) {
  context.get()?.let {
   replicatorService.stopReplication()
   DatabaseManager.getInstance(it).closeDatabases()
  }
 }
}- In the closeDatabase funciton we stop replication before closing the database
- Now open MainViewModel.kt and locate the MainView function.
@Composable
fun MainView(startDatabase: () -> Unit,
closeDatabase: () -> Unit) {- The MainView function takes in the startDatabase and closeDatabase functions from the MainViewModel and then tracks them in state.
// Safely update the current lambdas when a new one is provided
val currentOnStart by rememberUpdatedState(startDatabase)
val currentOnStop by rememberUpdatedState(closeDatabase)- The DisposableEffect API is used passing in the lifecyleOwer to observe lifecycle events of the application. These are used to detect when the application comes to the foreground or goes to the background. When the application goes to the background we want to stop replication and close the database and when the application comes back to the foreground we want to open the database.
//if lifecycleOwner changes, dispose and reset the effect
DisposableEffect(lifecycleOwner) {
// Create an observer that triggers our remembered callbacks
 val observer = LifecycleEventObserver { _, event ->
  if (event == Lifecycle.Event.ON_START) {
   currentOnStart()
  } else if (event == Lifecycle.Event.ON_PAUSE) {
    currentOnStop()
  }
 }
 // Add the observer to the lifecycle
 lifecycleOwner.lifecycle.addObserver(observer)

 // When the effect leaves the Composition, remove the observer
 onDispose {
  lifecycleOwner.lifecycle.removeObserver(observer)
 }
}- The
Lifecycle.Event.ON_STARTis used to call the startDatabase function in our MainViewModel - The
Lifecycle.Event.ON_PAUSEis used to call the closeDatabase function in our MainViewModel. - More information on DisposableEffect can be found in the Android documentation.
Exercise
In this exercise, we will observe how changes made on one app are synced across to the other app
- The app should be running in two emulators side by side
- Log into one of the emulators with the username "demo@example.com" and the password "P@ssw0rd12".
- On the other emulator log into the app with the username "demo1@example.com" and the password "P@ssw0rd12".
- Because demo and demo1 are on the same team - they should be able see changes made to documents by the other user.
- On one simulator, edit the name and location values of a project.
- Confirm that changes show up in the app on the other simulator.
- Similarly, make changes to the app in the other simulator and confirm that the changes are synced over to the first simulator.
Handling Conflicts during Data Synchronization
Data conflicts are inevitable in an environment where you can potentially have multiple writes updating the same data concurrently. Couchbase Mobile supports Automated Conflict Resolution. You can learn more about this in the documentation on Handling Data Conflicts.
Learn More
Congratulations on completing this step of the learning path! In this section, we walked through setting up the Replicator Config and started two-way replication between a mobile app and Sync Gateway.